[localhost -> localhost]: FAILED! => {“changed”: false, “msg”: “Python modules "botocore" or "boto3" are missing, please install both”}
이런 에러가 발생 할수도 있다. 이때는 inventory file을 변경해줘야한다.
---## AWS Credentialsaws_access_key:"THISISMYAWSACCESSKEY"aws_secret_key:"ThisIsMyAwSSecretKey"aws_region:"eu-west-1"## VPC Informationvpc_name:"My VPC"vpc_cidr_block:"10.0.0.0/16"## For Security Group Rule#my_ip: "X.X.X.X"## Subnetspublic_subnet_1_cidr:"10.0.0.0/24"```yaml이제 VPC를 만들 파일을 만들어보자.```yaml---# roles/vpc/tasks/main.yml# First task : creating the VPC.# We are using the variables set in the vars.yml file.# The module gives us back its result,# which contains information about our new VPC. # We register it in the variable my_vpc.- name:Create VPCec2_vpc_net:name:"{{ vpc_name }}"cidr_block:"{{ vpc_cidr_block }}"region:"{{ aws_region }}"aws_access_key:"{{ aws_access_key }}"aws_secret_key:"{{ aws_secret_key }}"state:"present"register:my_vpc# We now use the set_fact module # to save the id of the VPC in a new variable.- name:Set VPC ID in variableset_fact:vpc_id:"{{ my_vpc.vpc.id }}"# Creating our only Subnet in the VPC.# A subnet needs to be located in an Availability Zone (or AZ).# Again, we register the results in a variable for later.- name:Create Public Subnetec2_vpc_subnet:state:"present"vpc_id:"{{ vpc_id }}"cidr:"{{ public_subnet_1_cidr }}"az:"{{ aws_region }}a"region:"{{ aws_region }}"aws_access_key:"{{ aws_access_key }}"aws_secret_key:"{{ aws_secret_key }}"#map_public: "yes" # vpc가 instance를 생성할때 자동으로 public ip를 할당하게 하는 옵션 ( default: false )resource_tags:Name:"Public Subnet"register:my_public_subnet# We save the id of the Public Subnet in a new variable.- name:Set Public Subnet ID in variableset_fact:public_subnet_id:"{{ my_public_subnet.subnet.id }}"# Every VPC needs at least one Internet Gateway.# This component allows traffic between the VPC and the outside world.- name:Create Internet Gateway for VPCec2_vpc_igw:vpc_id:"{{ vpc_id }}"region:"{{ aws_region }}"aws_access_key:"{{ aws_access_key }}"aws_secret_key:"{{ aws_secret_key }}"state:"present"register:my_vpc_igw# We save the id of the Internet Gateway in a new variable.- name:Set Internet Gateway ID in variableset_fact:igw_id:"{{ my_vpc_igw.gateway_id }}"# Now we set up a Route Table. # We attach that Route Table to the Public Subnet.# The route we create here defines the default routing # of the table, redirecting requests to the Internet Gateway. # We don't see it here, but the route table will also contain # a route for resources inside the VPC, so that if we need # to reach an internal resource, we don't go to the Internet# Gateway.- name:Set up public subnet route tableec2_vpc_route_table:vpc_id:"{{ vpc_id }}"region:"{{ aws_region }}"aws_access_key:"{{ aws_access_key }}"aws_secret_key:"{{ aws_secret_key }}"tags:Name:"Public"subnets:- "{{ public_subnet_id }}"routes:- dest:"0.0.0.0/0"gateway_id:"{{ igw_id }}"
$ ansible-playbook playbook.yml -i inventory -e @vars.yml
PLAY [local] ****************************************************************************************
TASK [Gathering Facts] ******************************************************************************
ok: [localhost]TASK [vpc : Create VPC] *****************************************************************************
changed: [localhost]TASK [vpc : Set VPC ID in variable] *****************************************************************
ok: [localhost]TASK [vpc : Create Public Subnet] *******************************************************************
changed: [localhost]TASK [vpc : Set Public Subnet ID in variable] *******************************************************
ok: [localhost]TASK [vpc : Create Internet Gateway for VPC] ********************************************************
changed: [localhost]TASK [vpc : Set Internet Gateway ID in variable] ****************************************************
ok: [localhost]TASK [vpc : Set up public subnet route table] *******************************************************
changed: [localhost]PLAY RECAP ******************************************************************************************
localhost : ok=8changed=4unreachable=0failed=0
AWS에서 확인해보면 잘 생성된걸 볼 수 있다.
ansible
peering 을 하기 위해서 다른 리전에 vpc를 새로 생성했다. 위의 vars.yml 파일의 내용을 변경하면 된다.
aws_region 변경
vpc_cidr_block 변경
public_subnet_1_cidr 변경
ansible
peering을 하려면 겹치기 않게 CIDR 블록을 다르게 설정해야 한다. 위의 사진에서 생성한 VPC를 보면 두 개가 서로 다른 것을 볼 수 있다.
생성이 완료 되었으니 수동으로 peering을 해보자. 다음 글에서는 Ansible에서 peering까지 다뤄 볼 예정이다.
Peering
ansible
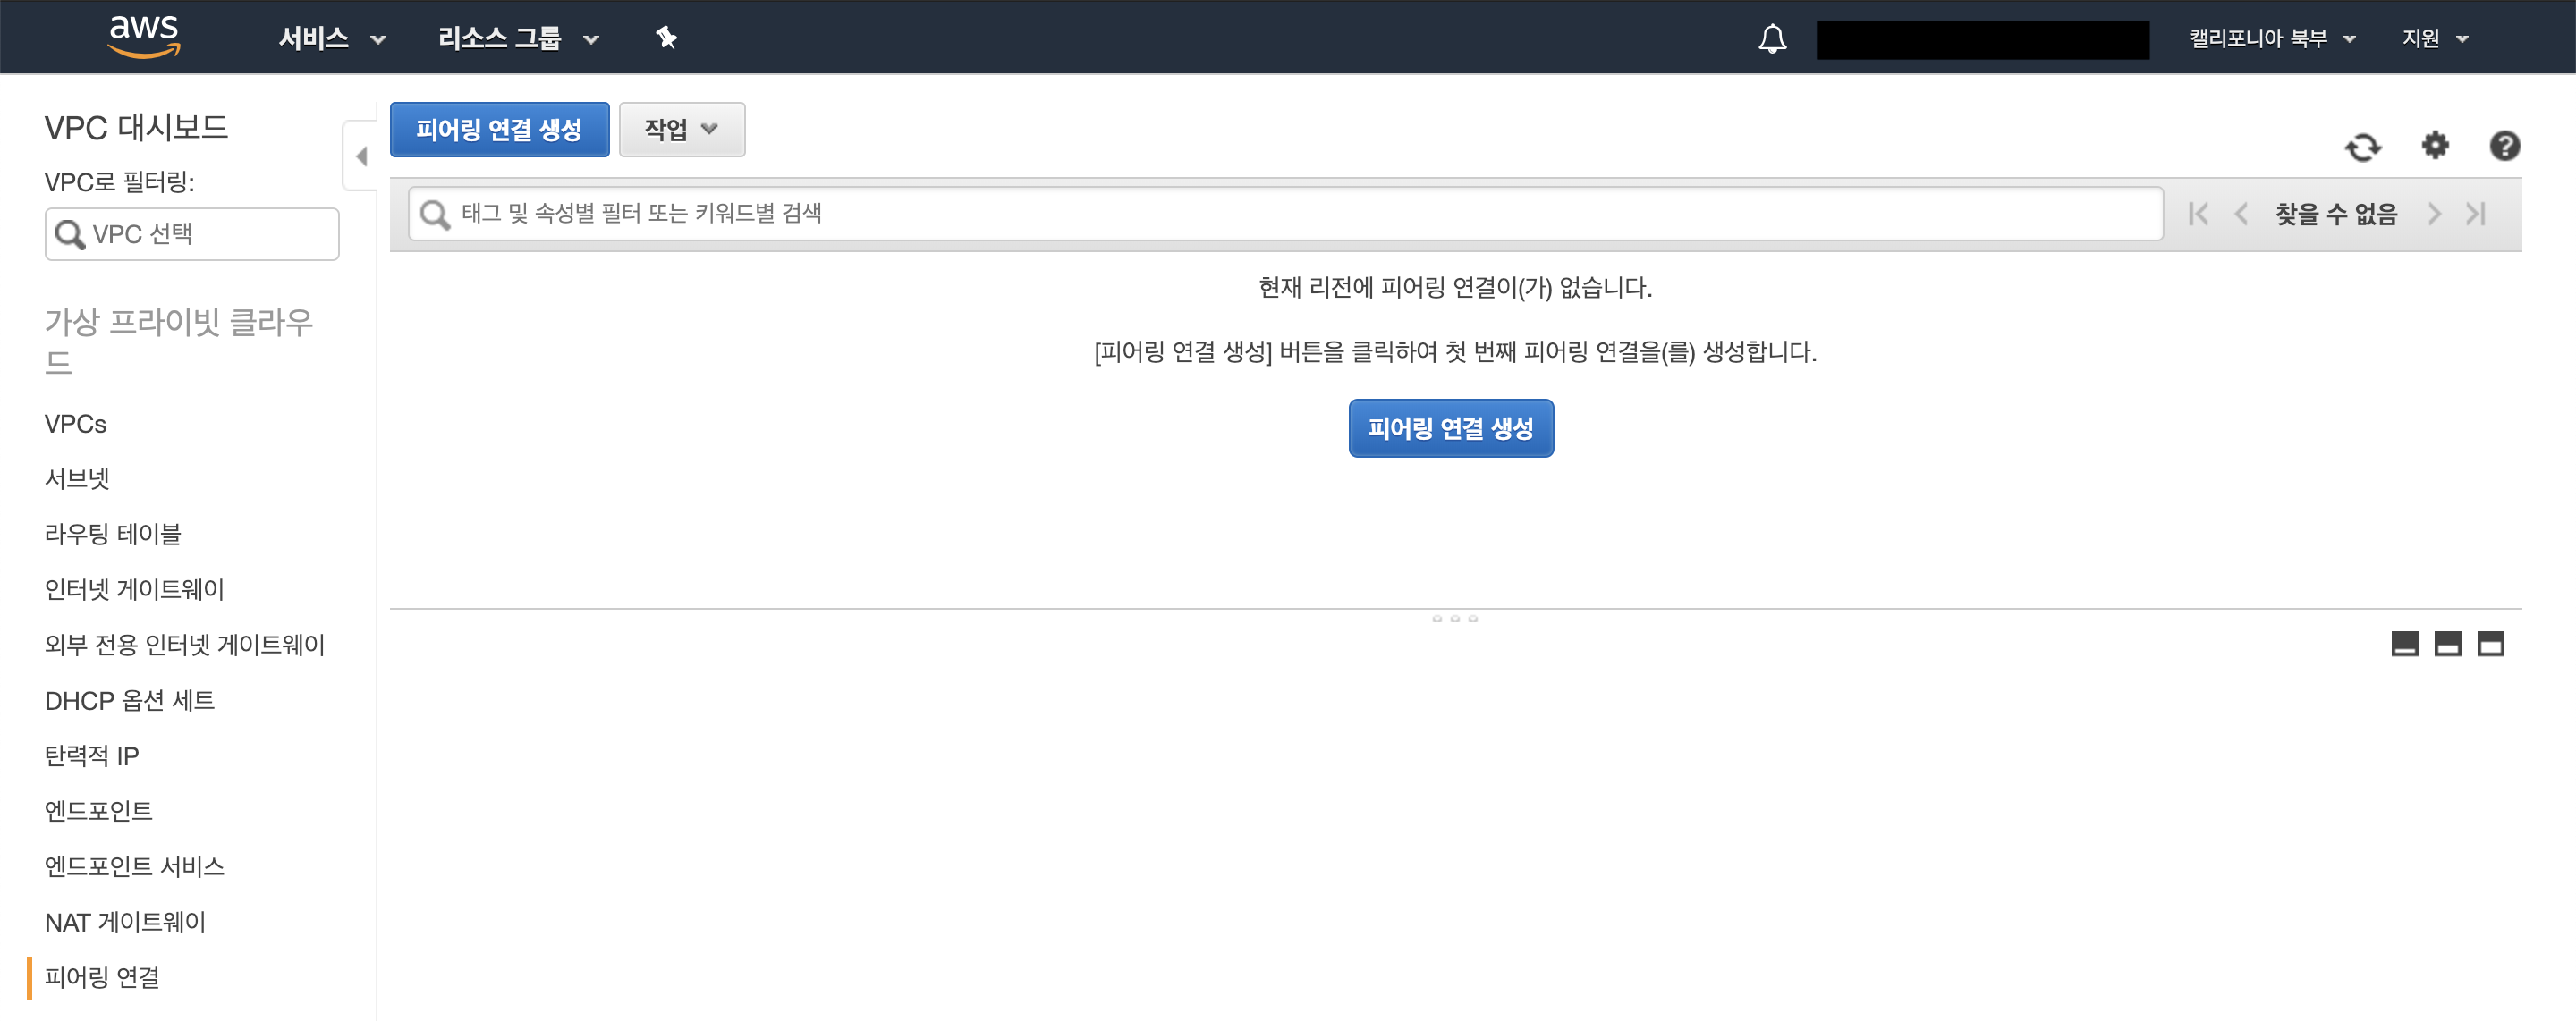
AWS vpc에 들어오면 피어링 연결 목록이 있다.
생성을 누르고 설정을 해준다.
ansible
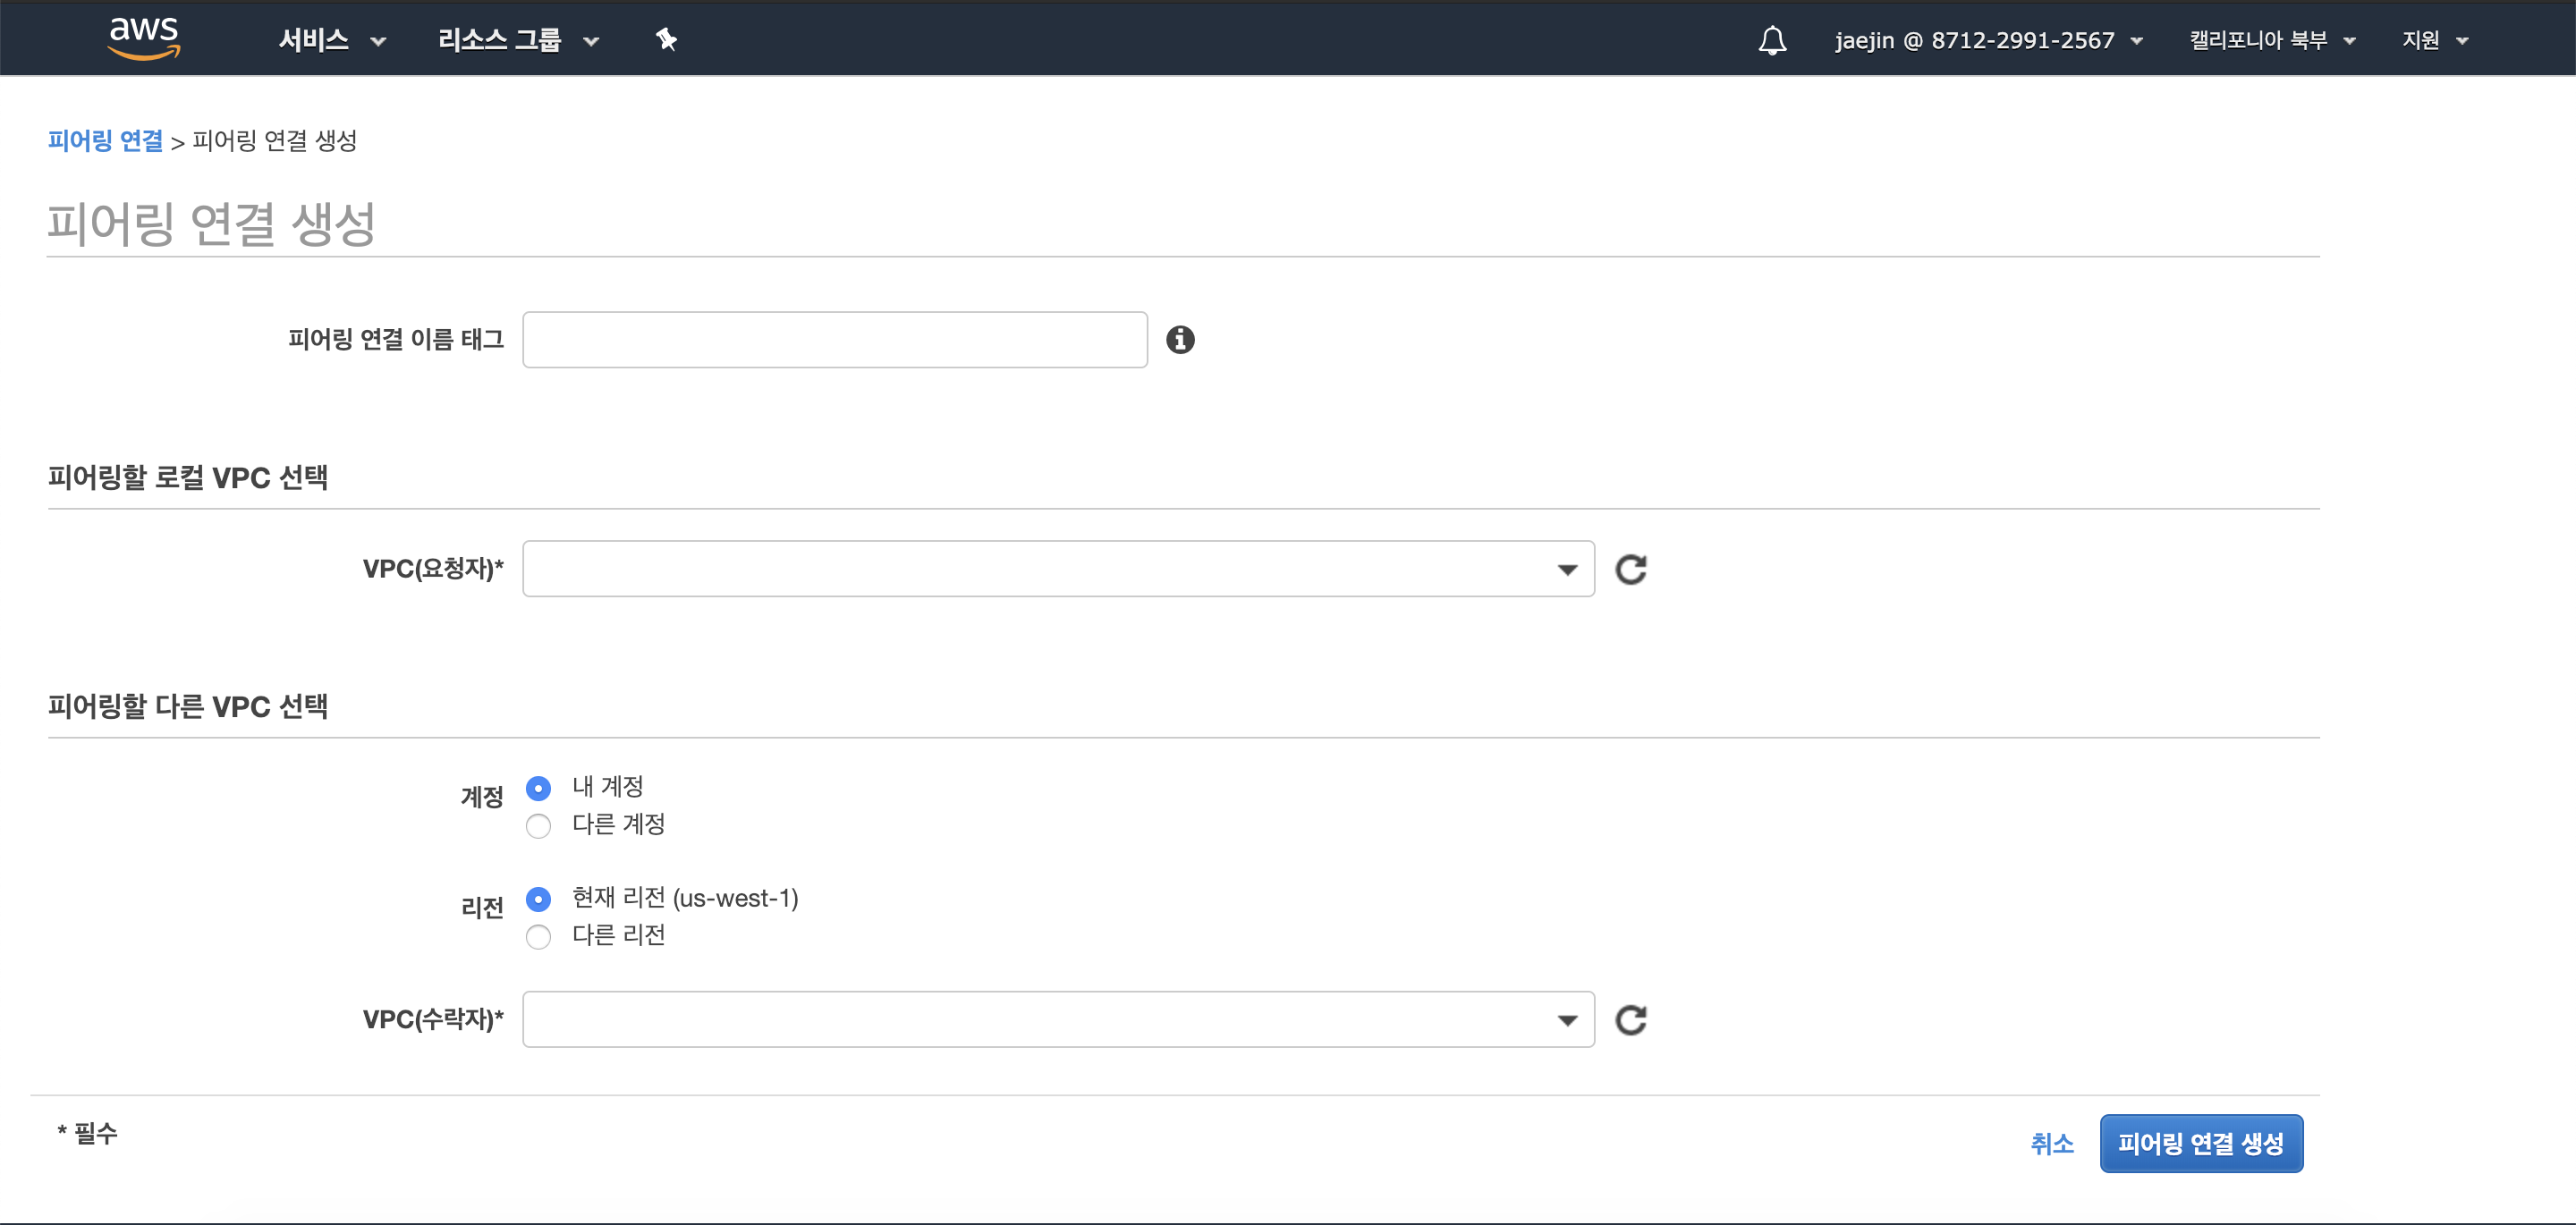
피어링 연결 이름 태그에는 이름을 써주고
로컬 VPC는 현재 접속중인 리전의 VPC를 선택한다.
피어링할 다른 VPC 선택 항목에서는 아까 다른 리전에 생성한 VPC를 써준다. 만약 다른 계정이라면 다른 계정을 선택. 현재 리전의 VPC 피어링도 가능하다.
ansible
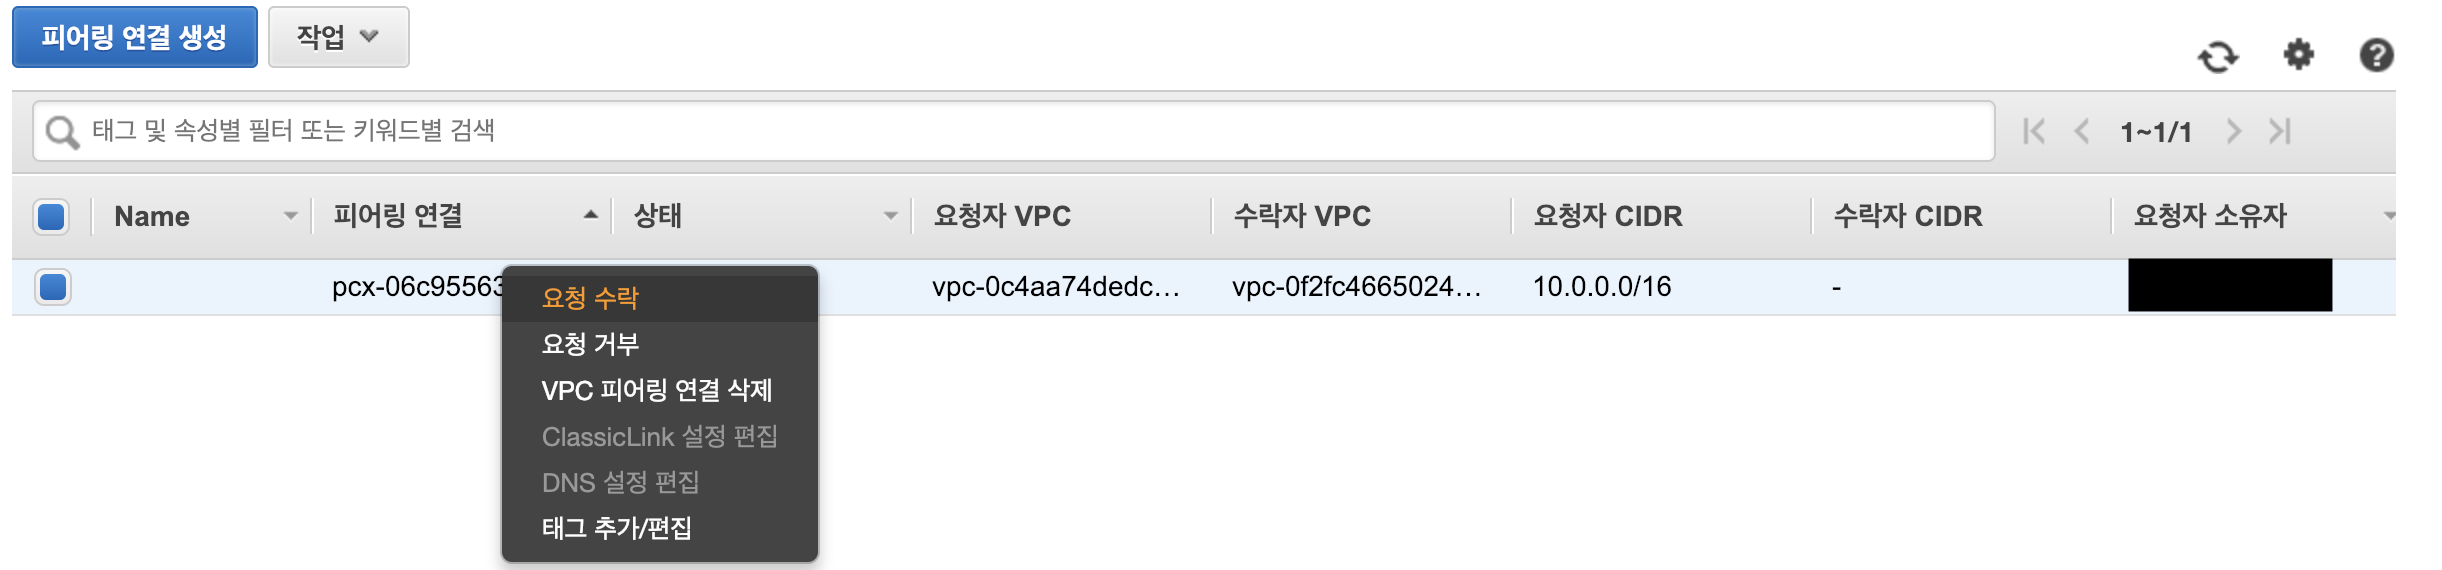
상태가 수락 대기중이다. 연결 할 리전의 VPC에 들어가서 수락을 해준다.
ansible
수락하게 되면 상태가 활성화 되면서 연결에 성공하였다.
ansible
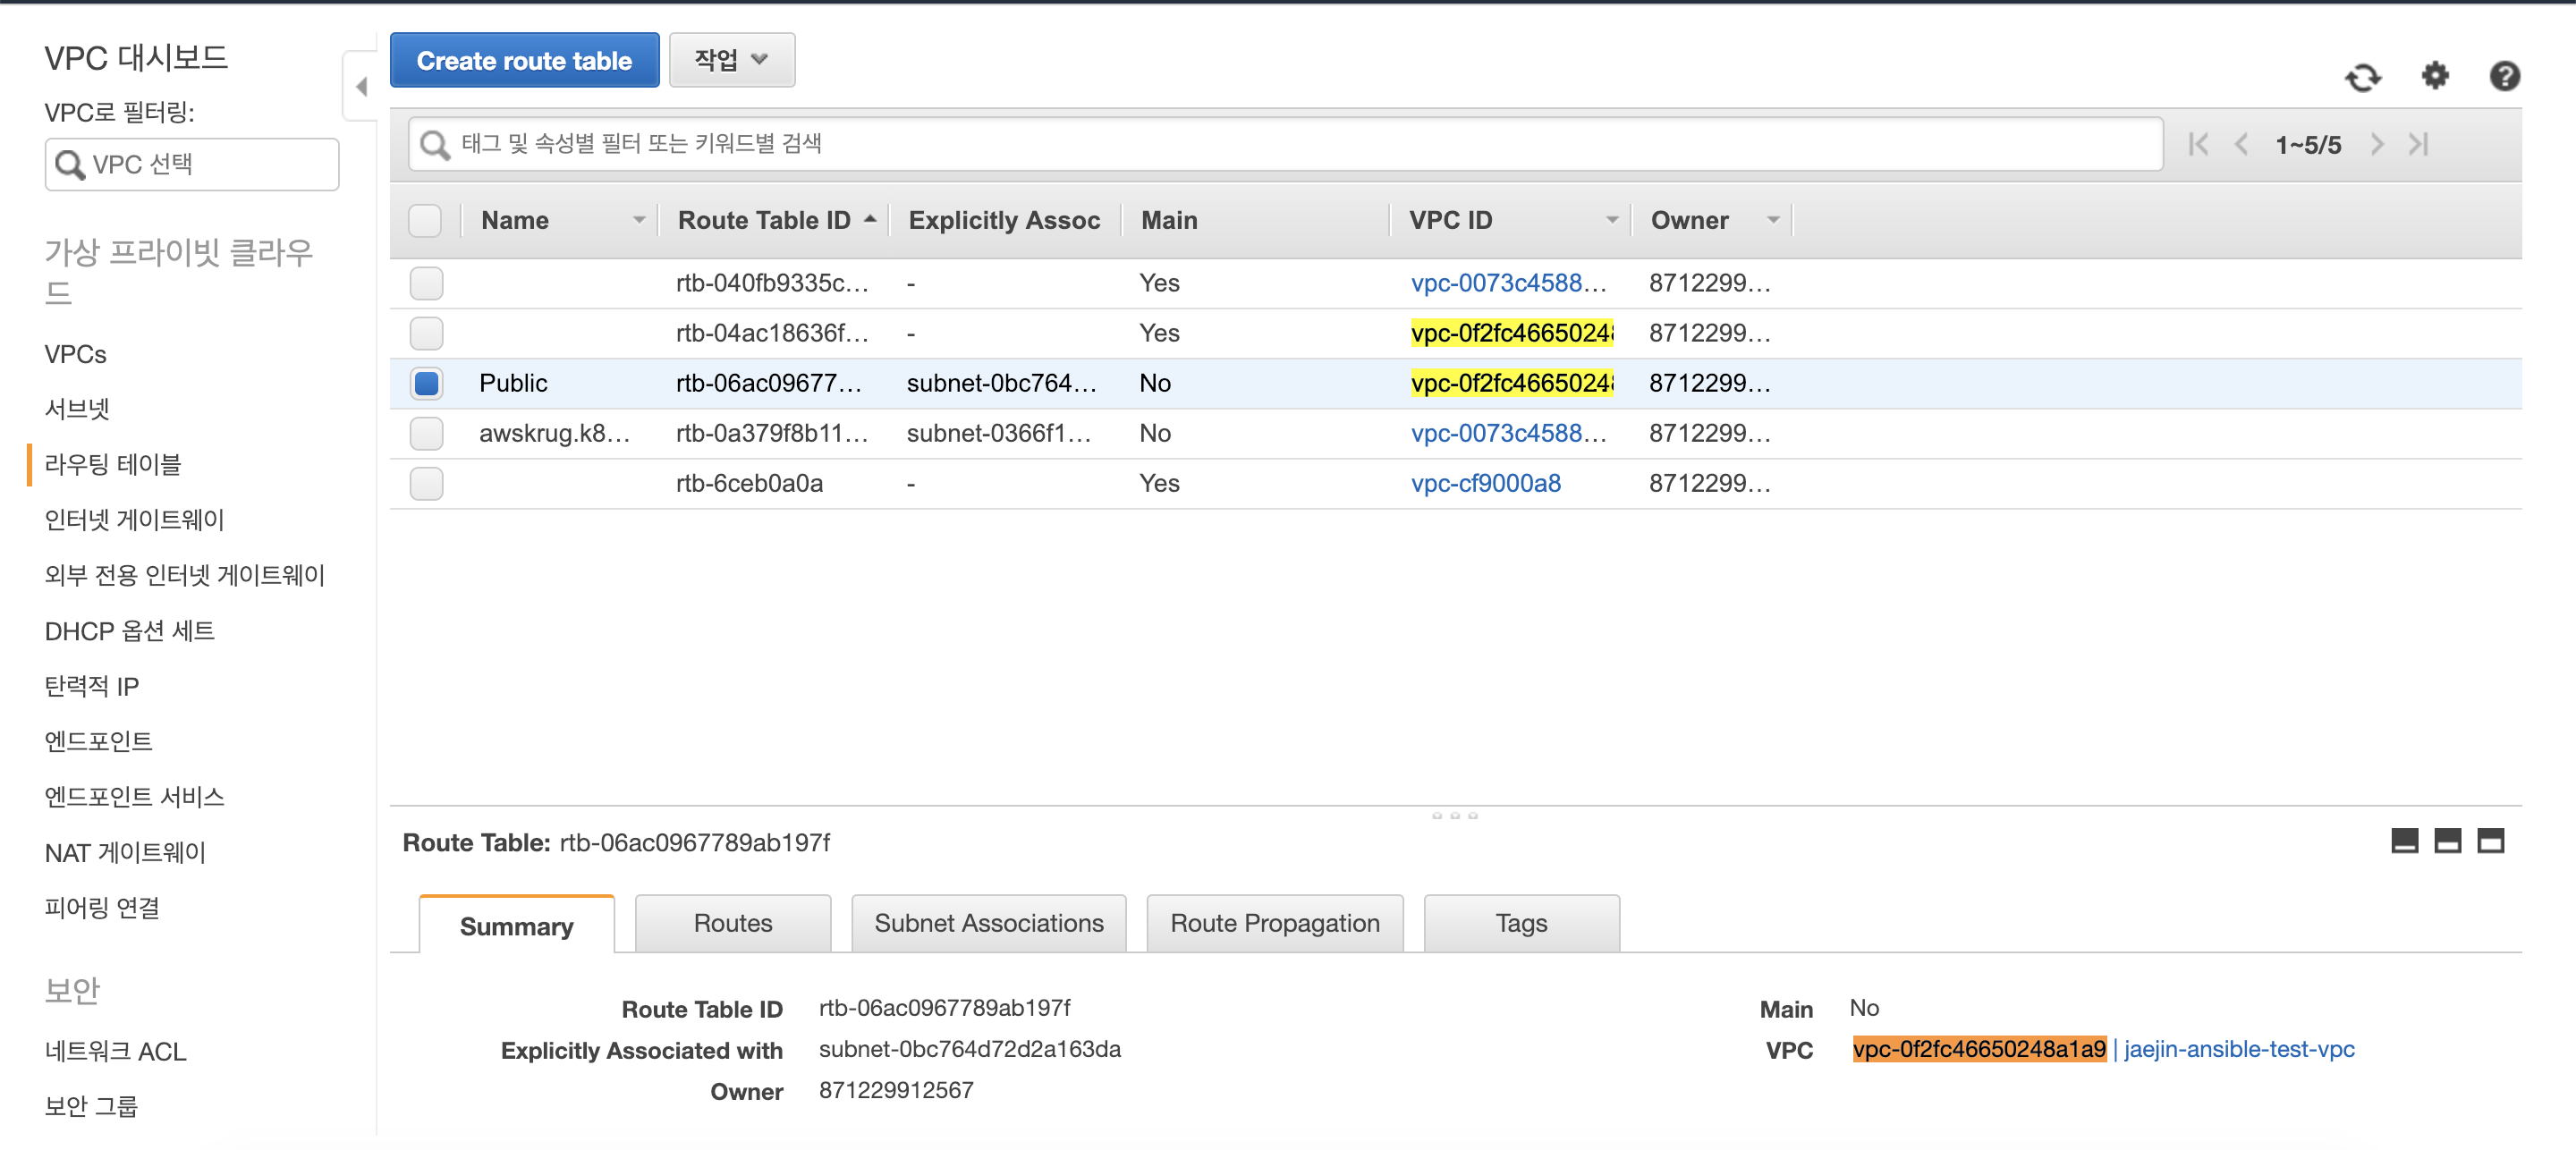
하지만 각 VPC에 연결된 Instance끼리 통신은 안될 것이다. 그 이유는 라우팅 테이블에 명시를 해줘야한다.
라우팅 테이블
왼쪽항목에 라우팅 테이블이 있고 선택하면 아까 생성한 VPC에 연결된 라우팅 테이블이 있을것이다.
ansible
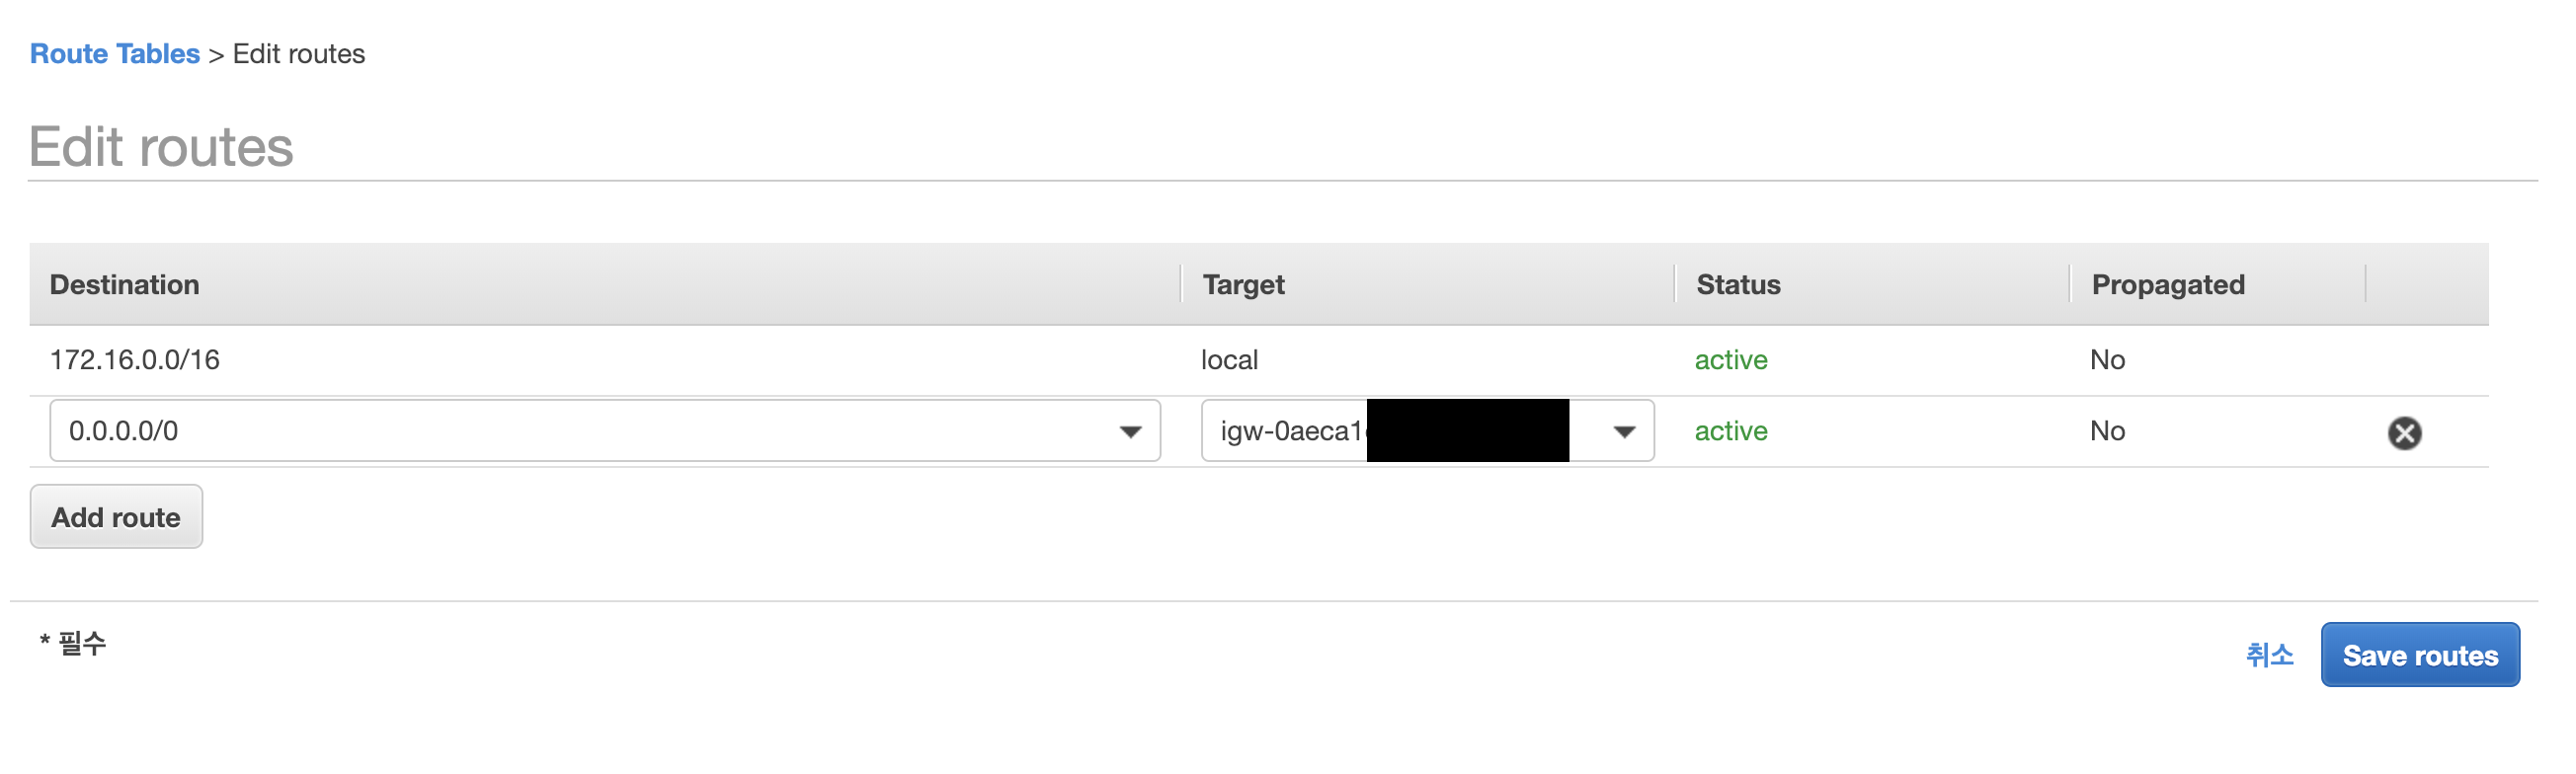
선택을 하고 밑쪽에 Routes에 들어가 Edit routes를 클릭한다.
ansible
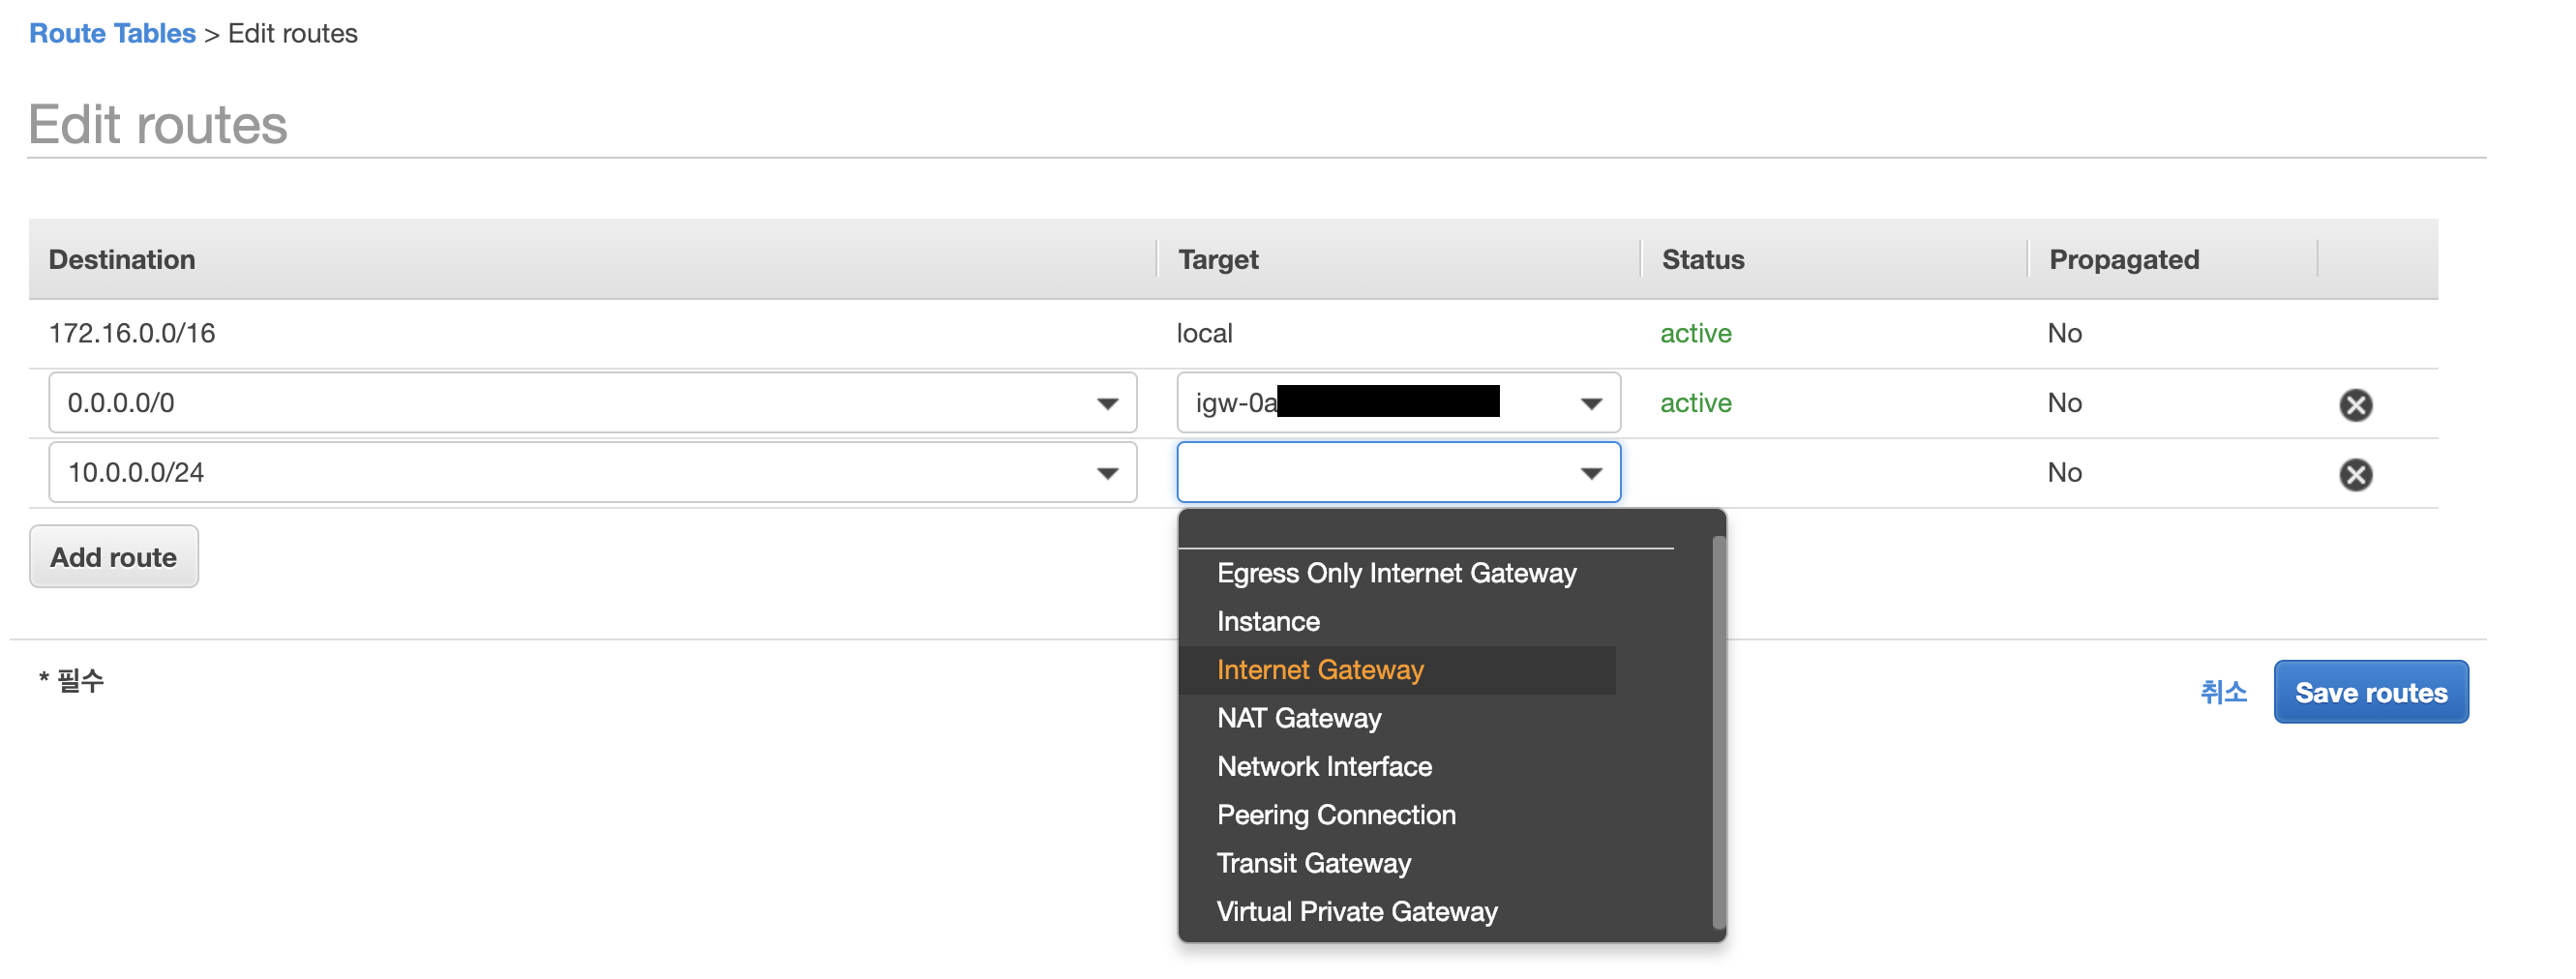
Add route를 선택하고 추가해준다.
ansible
internet Gateway를 선택하고 다른 리전에 있는 internet gateway의 ID를 입력해준다.